Right at the bottom is the Menu (Palette) containing all the programming blocks, the "language" you use to talk with the computer. To program a robot, you can drag and drop these programming blocks to the working area, the white area in the center (click on programming block, drag to working area in the center and let go). The very first block you should put in the working area is the START block
 . To start a program going, you click on this START block.
Then depending on what you want the robot to do, you drag other programming blocks to join to the START block (click, drag to near the START block then let go, the block will attach itself to the START block or to other blocks you have already joined to the START block.
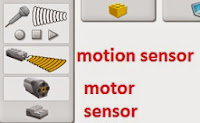
When you connect motors or sensors to the USB hub, the connection tab will show like in this picture:
 .
.On top will be the Recording tab
 which is used for recording your own sound.
To the right is the CONTENT TAB
 . Click this to show information on GETTING STARTED and ACTIVITIES.
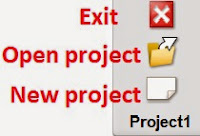
At the top right end of the screen is the PROJECT TAB
 . Click the red X to close the program, Below that are icons to open a project file and below that is the icon to open a NEW PROJECT.
At the bottom right corner just on top of the MENU bar is the red STOP PROGRAM button
 . Click this when you want to stop a running program.

No comments:
Post a Comment